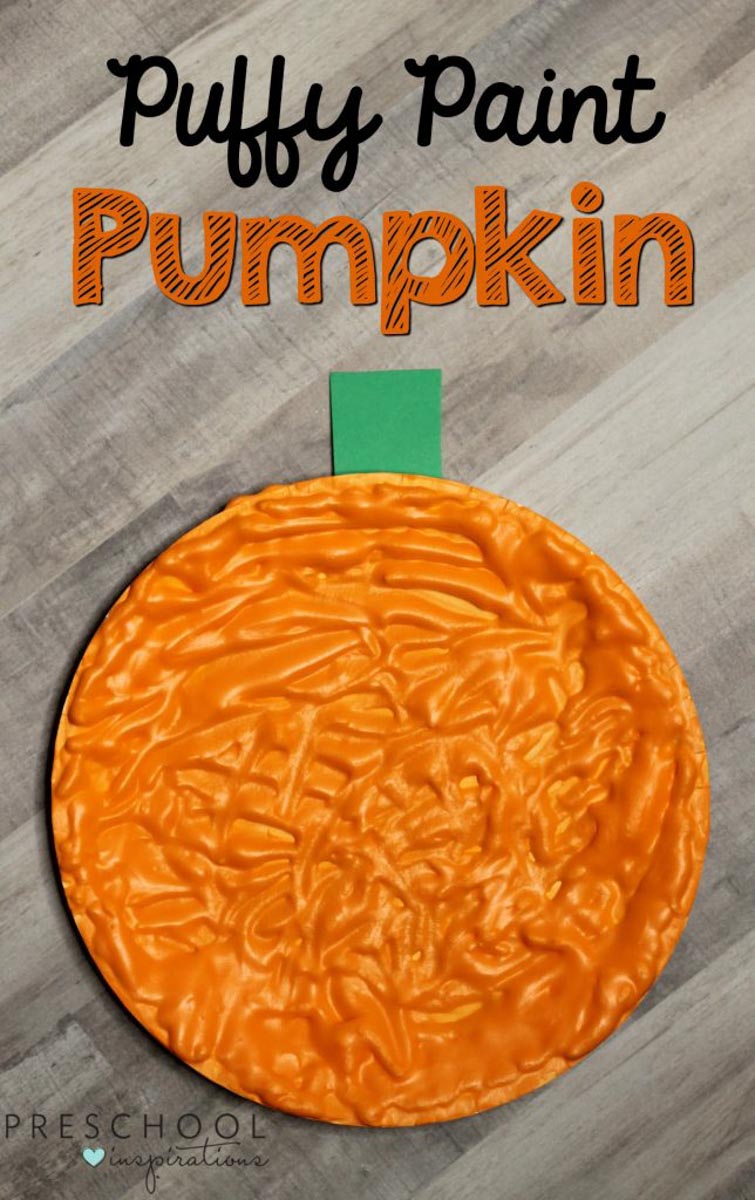
These puffy paint pumpkins smell great, and they will brighten up your room too. Your students are sure to love making this simple fall art activity.
It’s finally beginning to feel like fall. The farmers are harvesting the crops and the leaves are falling off the trees. Of course, it’s not fall without pumpkins! Today, we decorated our classroom with puffy paint pumpkins. One of our favorite art supplies to use when we are creating process art crafts is our homemade puffy paint. It is so easy to make and my students always love to paint with it.
How To Make Puffy Paint Pumpkins:
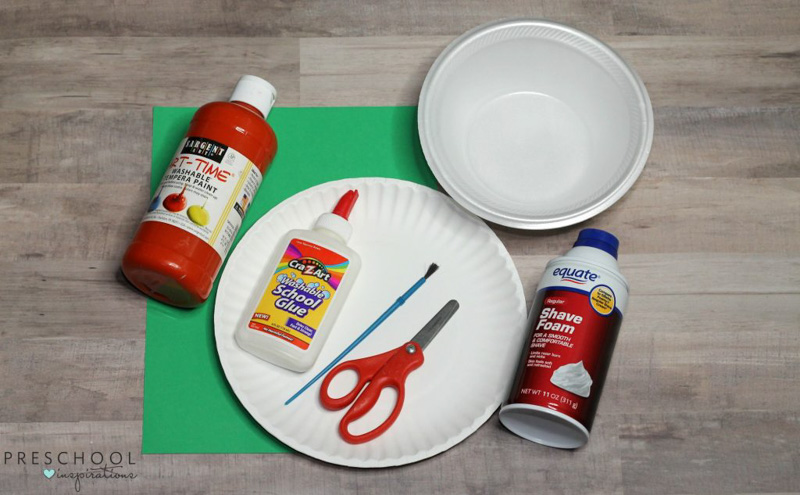
Supplies:
- Shaving Cream
- White Glue
- Orange Paint or Food Coloring
- Pumpkin Spice
- Bowl
- Paper Plate
- Paint Brush
- Green Card Stock or Craft Foam
- Scissors
- Black Card Stock or Craft Foam (optional)
Set Up:
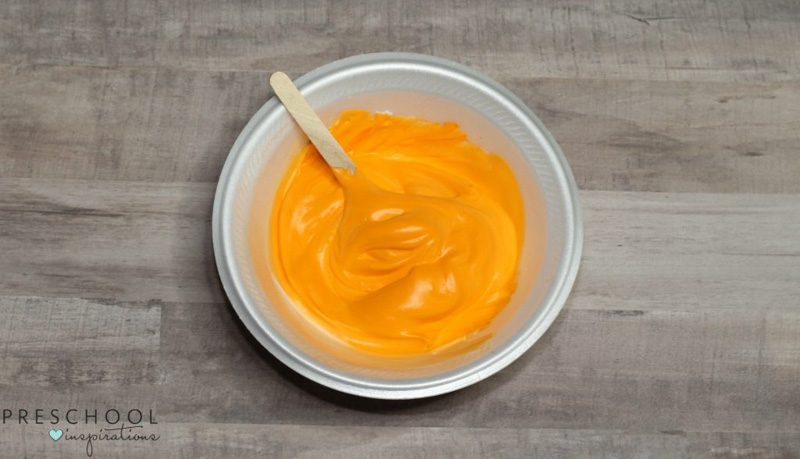
Before making this fall art activity, you need to prepare the puffy paint. It is easy to make so I let my students help me.

Get the best learning activities for 3-5 year olds at your fingertips
First, mix one-part shaving cream and one part white glue together in a bowl.
Next, add a few drops of orange paint or food coloring and pumpkin spice and mix the ingredients together. You can add more paint or food coloring and pumpkin spice until you have your desired color and scent.
Fall Art Activity Directions:
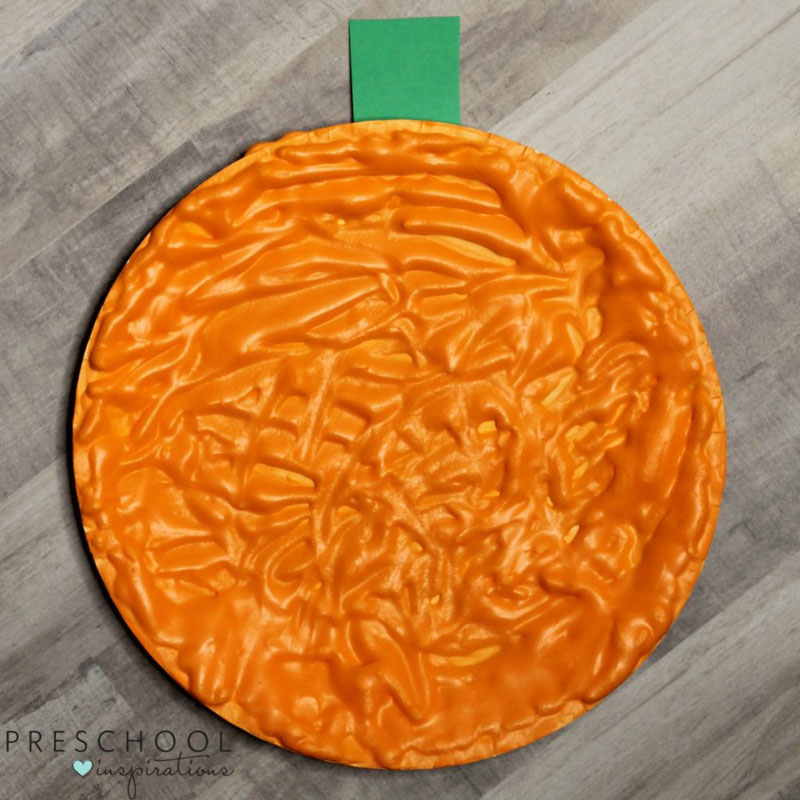
To begin, your students will use the orange puffy paint to paint a paper plate. Encourage children to cover all the sides of the plate and get into those little nooks and crannies on the side of the plate.

After the paint dries, invite the children to cut a rectangle using the green card stock or craft foam. Next, they can glue it to the top back side of the paper plate to create the pumpkin’s stem.
As an added option, your students can cut eyes, a nose, and mouth out of the black card stock or craft foam. Then they can glue it in the middle of the paper plate to create a festive jack-o-lantern.
After the glue dries, you can create a pumpkin patch and display all of your students’ pumpkins on a bulletin board or around the classroom door.
These Puffy Paint Pumpkins not only smell great but they will brighten up your room too. Your students are sure to love making this simple fall art activity.
Pumpkin Ideas and Activities
- Puffy Paint Pumpkin Art
- Painted Foam Book Character Pumpkin Craft
- Pumpkin Activities for Preschool
- Pumpkin Writing Center
- Pumpkin Books
- Paper Plate Jack O Lantern Craft
Math and Literacy Centers for the Whole Year!
Looking for the perfect math and literacy centers to foster independence this year? These preschool centers cover every month and are oh-so engaging for little hands. Check them out!


- Make Pine Cone Bird Feeders with the Kids This Spring - May 7, 2018
- Easy Torn Paper Flowers for Kids to Make This Spring - April 16, 2018
- Colorful and Fun Tape Resist Easter Egg Art - March 12, 2018

I love this idea! I am doing inclusive speech therapy services in a classroom this year and this is a perfect craft to do with my kiddos!
I am so glad to hear that, Danielle! Thank you for all you do for children!
Did you use coated or uncoated paper plates? Thanks!
Hi Debbie,
Uncoated is what we used. If you try coated, I’d love to hear about it!
Hello Katie what age group would this activity be appropriate for?
Hi Maria Elena,
I think this would work well for kids who wouldn’t be tempted to put it in their mouths, so definitely a range of ages :).
Warmly,
How long did it take to dry ? I work at a 1/2 pre school and I’m wondering if it would take to long to dry for my kid’s
I like to let these kinds of projects dry for a few hours or overnight.
Is it best to apply with a brush, spoon or hands? 😜
Great question! I love to use a disposable spoon so that we can toss it afterward.