A paper plate Christmas tree + puffy paint = Ahhhhmazing Christmasy goodness!
This paper plate Christmas tree with puffy paint is possibly my favorite Christmas art activity. The kids loved it, and I’ve been placing them around our home, smiling each time I see them.
Plus, they are soft to the touch.

Get the best learning activities for 3-5 year olds at your fingertips
It’s always a win-win when we find projects that are super fun to create and are also perfect décor around the house or classroom.
I especially love when children can do it by themselves and make it feel like their own. And as a parent, it makes my heart so happy to bring home art I know my children made.
Plus, I will take any opportunity to do Christmas art! There’s just something about seasonal art and craft projects. They’re so sentimental and some of it has become a treasure in our home.
Paper Plate Christmas Tree
Let me give you the scoop on how we made these super cool 3D paper plate Christmas trees with puffy paint!
Materials Needed for Puffy Paint Christmas Trees
- Puffy Paint (see my easy recipe below!)
- Paper Plates (uncoated, standard size works perfectly)
- Craft sticks
- Art trays
- Christmas Confetti
- Glitter
DIY Puffy Paint Recipe
Puffy paint is a fun art and sensory recipe that you make. After it dries, it’s soft to the touch! You’ll want to get this puffy paint put together first then make your lovely tree!
Ingredients:
- 1 part liquid glue
- 1.5-3 parts shaving cream
- A squirt of green paint
This puffy paint recipe is a bit different from my normal 3 ingredient puffy paint recipe. Usually, it’s 1 part glue to 1 part shaving cream, but we wanted to make it extra fluffy since the Christmas trees are vertical instead of on a flat surface.
If you’re making a small amount, start with 1/4 cup of glue. If you need a lot, start with more. I like to make a few medium sized batches for preschool classes because sometimes the huge batches can get a bit unruly.
Puffy paint is also “fragile.” Tell little hands to use their most gentle touches with it.
Puffy Paint Directions:
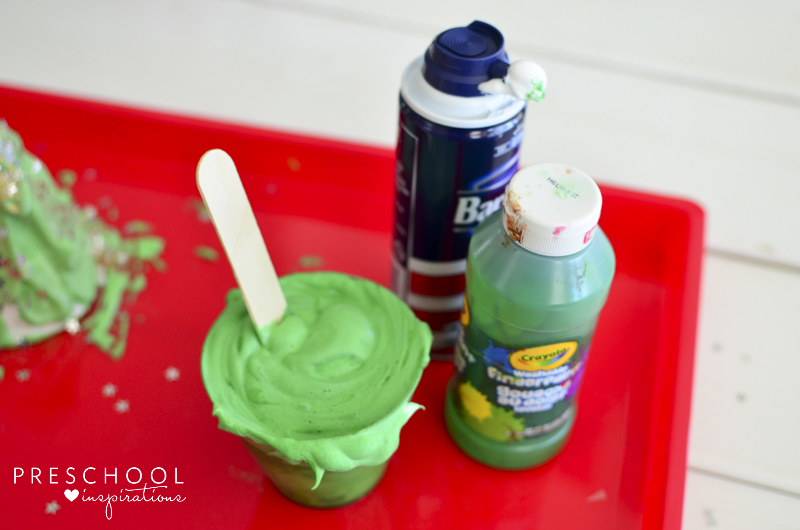
Mix 1 part white liquid glue with 1 part shaving cream and stir with the craft stick. Keep adding shaving cream until you get some sturdy peaks going. Otherwise, you could have a melted-looking Christmas tree.
Add green paint to your liking. I added A LOT! The white really absorbs the green, so have a whole bottle handy. Mix again until you get those sturdy peaks turned green! You can substitute food coloring or liquid watercolor if you don’t have paint.
Grab the printable instructions below-
DIY Puffy Paint Christmas Tree Craft
Easy DIY Christmas Decorations for Kids to Make
Materials
- Puffy Paint (Shaving Cream, Glue, and Paint)
- Paper Plates
- Scissors
- Stapler
- Craft sticks
- Christmas Confetti
- Glitter
- Art Trays *optional
Instructions
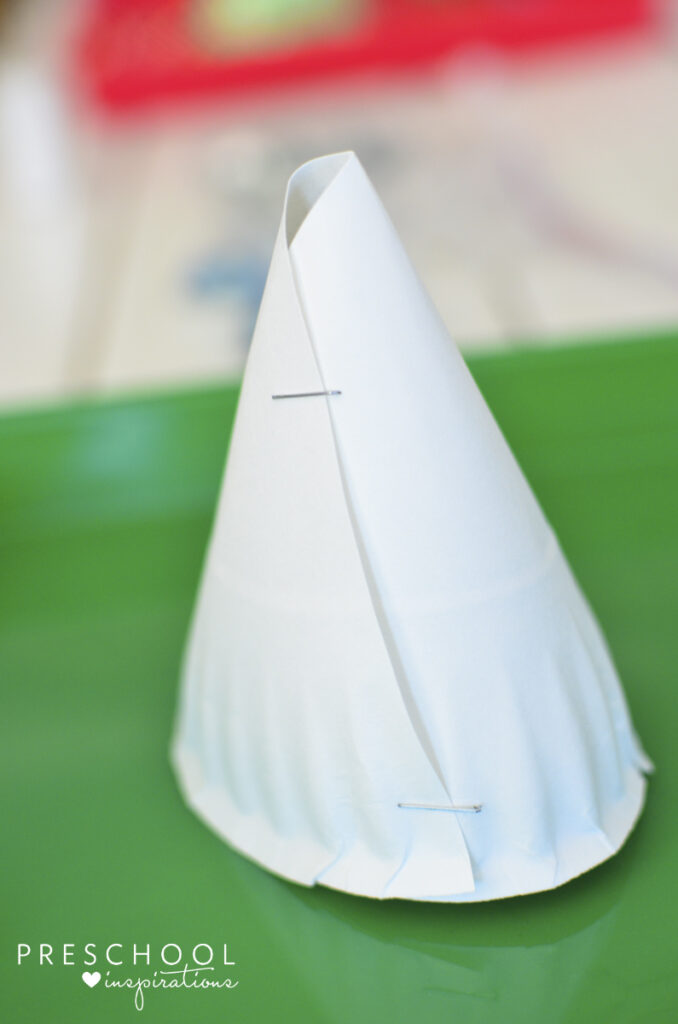
- Cut the paper plate in half
- Wrap the paper plate into a cone and staple into place
- Make puffy paint by mixing 1 part glue with 1.5-3 parts shaving cream and a squeeze of paint
- Use a craft (popsicle) stick to spread the puffy paint over the paper plate
- Decorate with confetti or glitter as desired (this can be done on a craft tray to contain the extras)
- Allow to fully dry (6 hours or more)
- Enjoy your DIY Christmas decorations!
Notes
For smaller kids, use a larger piece of the paper plate to make a wider and more study tree.
Make a Puffy Paint Christmas Tree Craft
This Christmas craft for kids just takes a little prep, and you will be so glad you did because they are a crowd pleaser!
Directions:
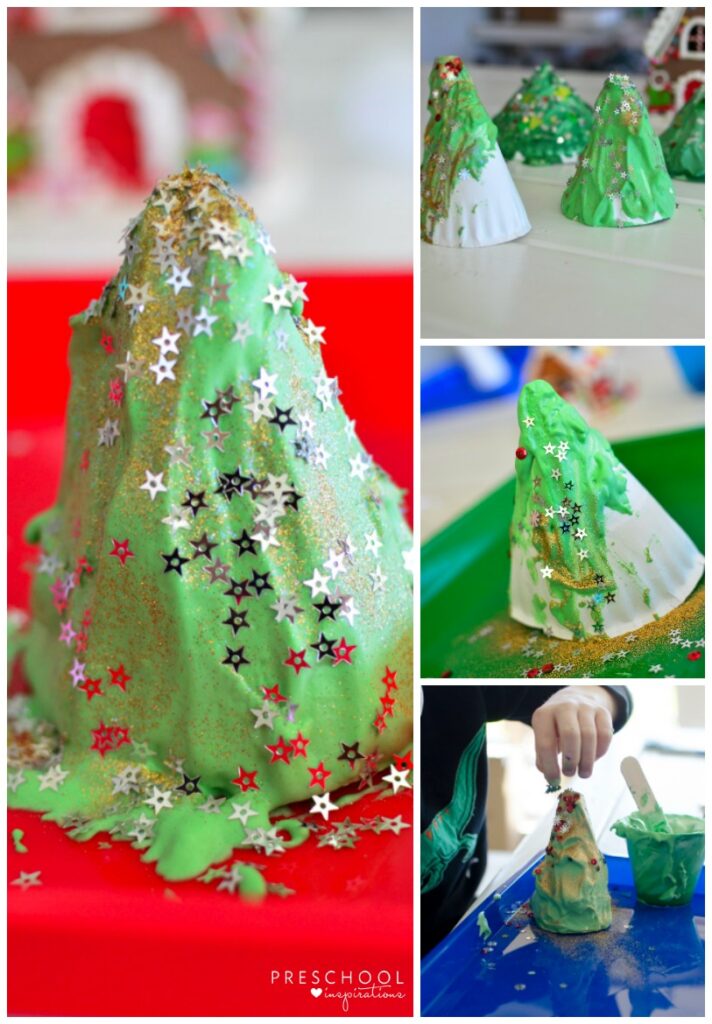
First, cut the paper plate in half.
Next, wrap the plate around itself (kind of like a dress) and staple it together in 2 spots, near the top and at the bottom. Voila! Now, you have a white and tall Christmas tree.
Alternatively, you can make wider paper plate Christmas trees. This works well for toddlers who might need a tree that is more stable to paint on.
To do this, cut out ¼ slice of the paper plate instead of cutting it in half and wrap it around that way. It’s like cutting a piece of pizza out of that helps.
I think that cutting the paper plate in half looks perfect because it’s taller, but the broader tree is easier to spread the puffy paint on. Go with what works best for you!
Now, it’s time for the magic!

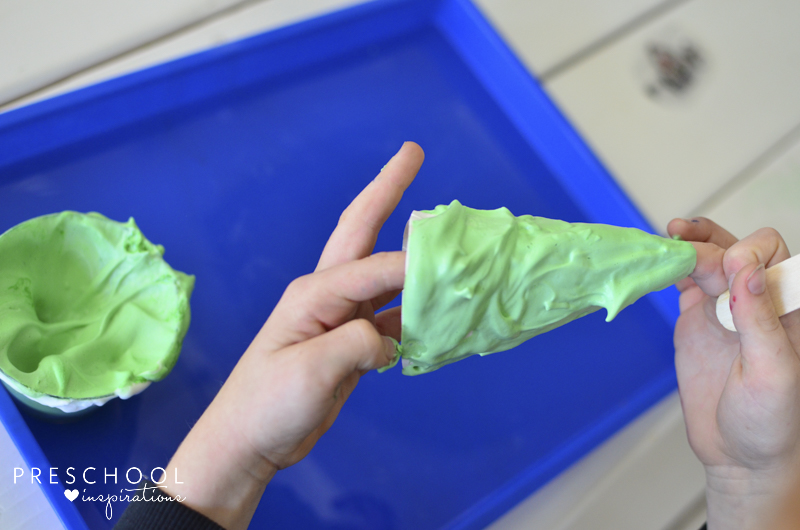
Put the puffy paint and white Christmas tree on the tray.
The craft stick will become the magical puffy paint paintbrush. It helps keep it nice and thick and gives us that pretty wavy effect. Plus, when you are finished with this activity, you can use those craft sticks to make this pom pom Christmas tree ornament.
Those taller trees might need to be hoisted up to get completely painted.
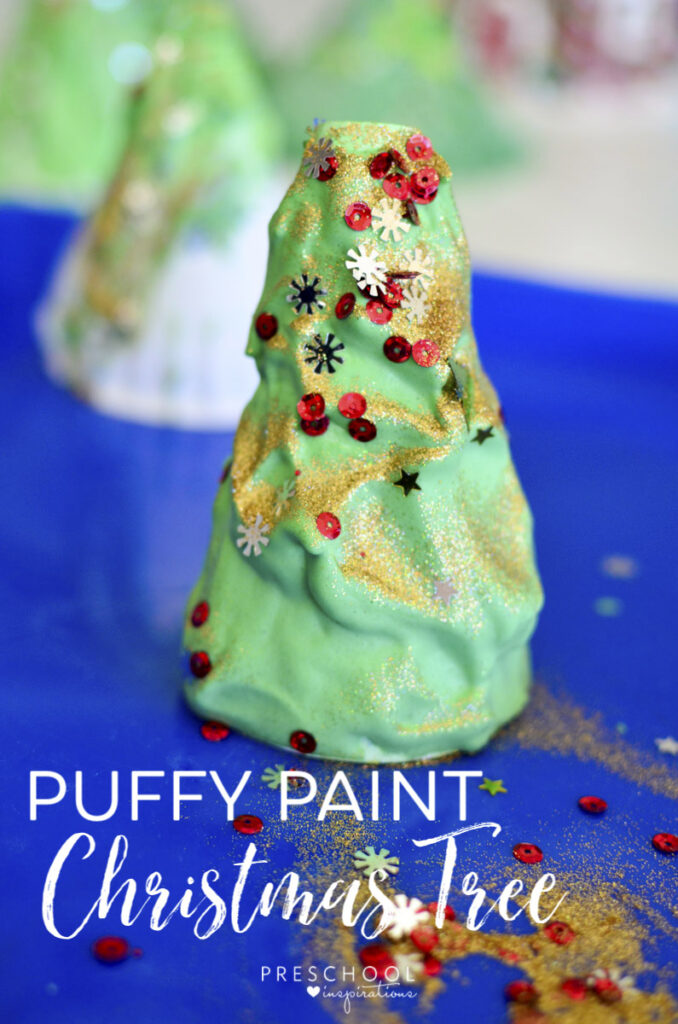
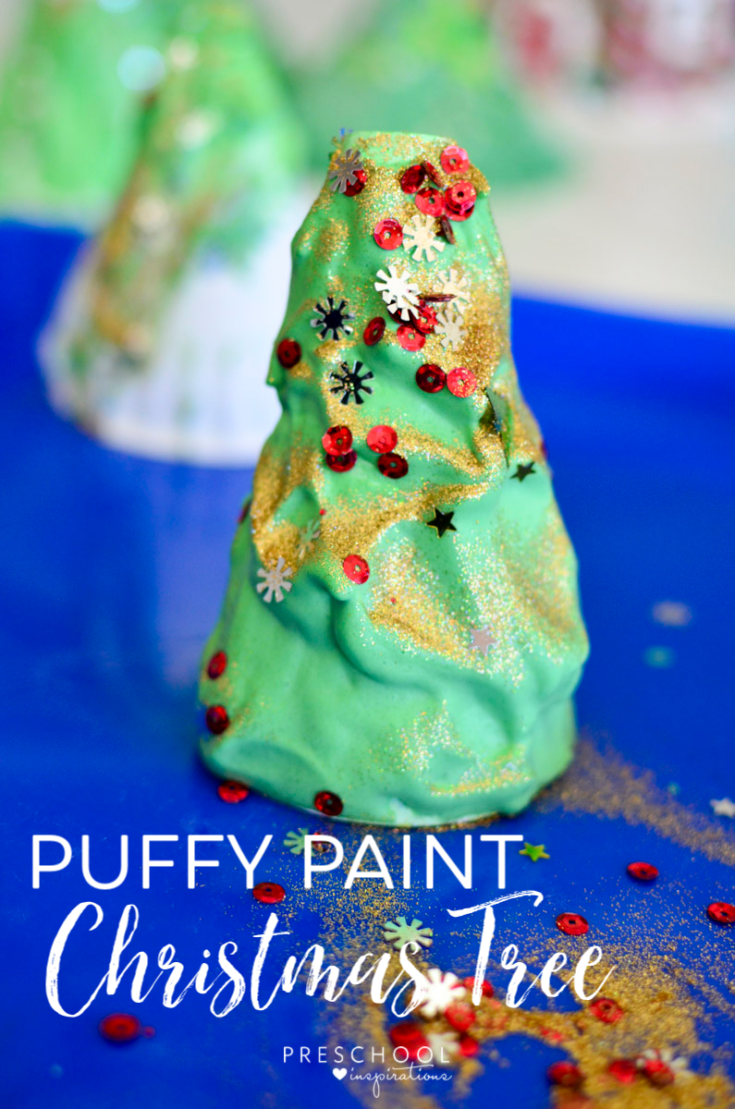
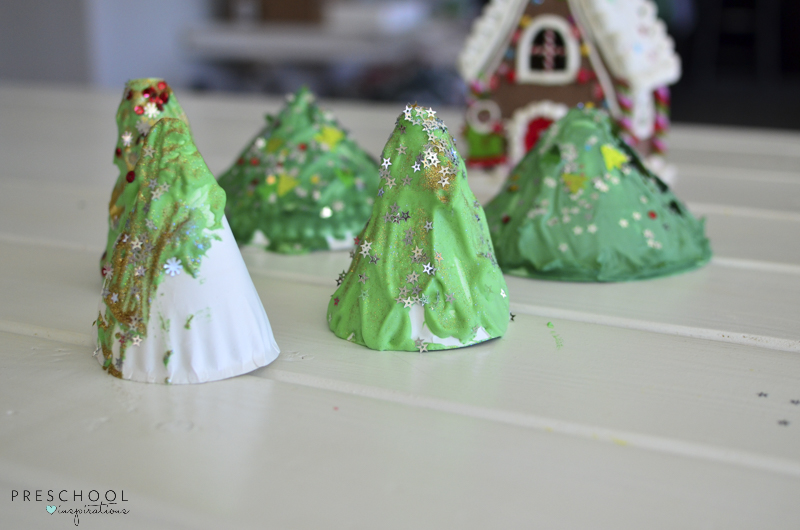
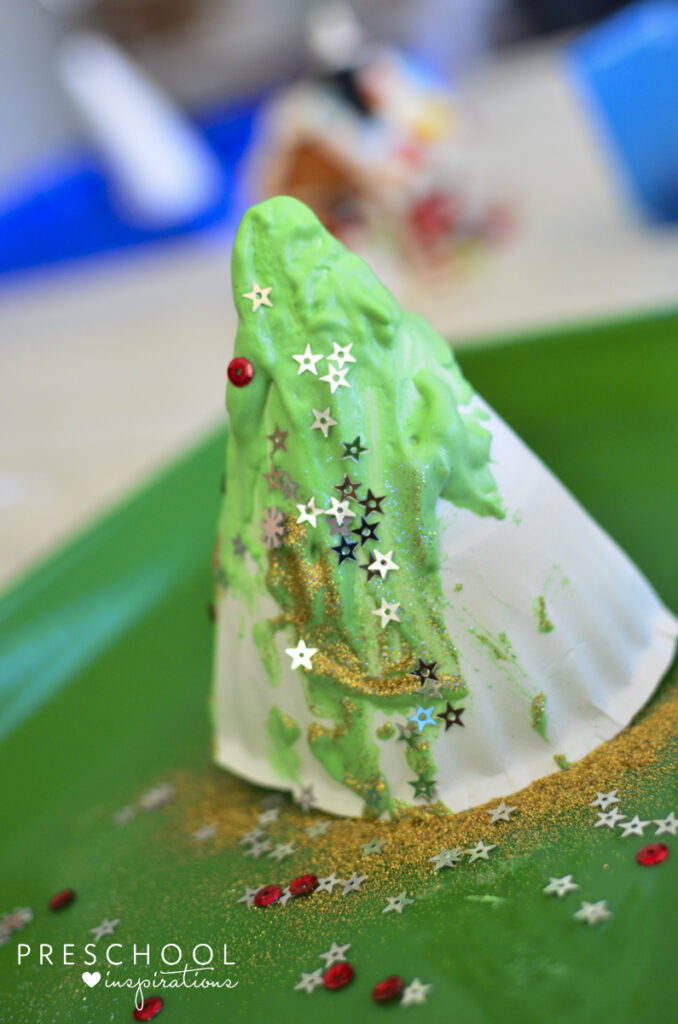
Now, it’s time for the Christmas confetti and glitter. They make the perfect ornaments and garland!
Some children will shower their puffy paint Christmas tree in their confetti and glitter. Others may carefully and meticulously put it on.
My 2nd grader had a spot in mind for each speck.
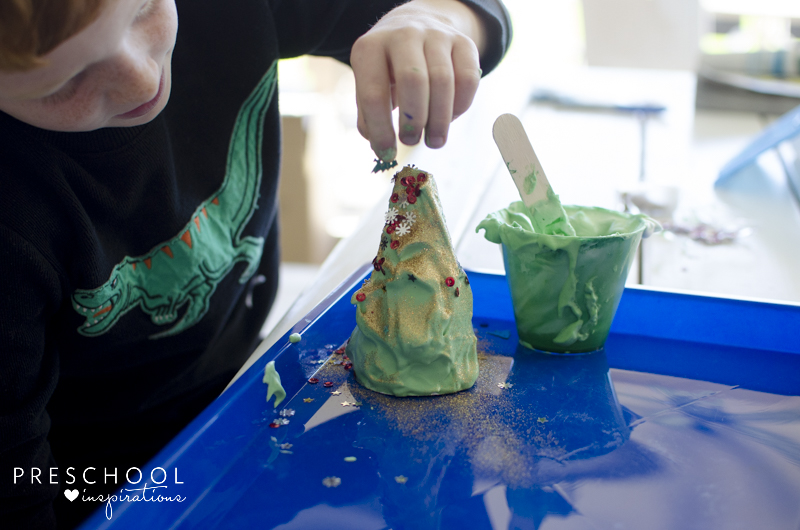
My preschooler just sprinkled it all “where it needed to be.”
Then it’s time to dry. This takes a while!
We live in Arizona, so it’s suuuuper dry here. It turns out that living in the desert is great for drying time. Ours took about six hours. Yours could take a whole day.
But when it’s all dry, you get these beautiful paper plate Christmas trees!
Keep in mind that puffy paint doesn’t stay puffy forever. It will dry and be super soft to the touch. But then it deflates a few days later. These puffy paint Christmas trees will likely just last for one season. But they will look beautiful while they do!
Related Posts


- The Best Movement and Action Songs for Children - January 8, 2026
- Back to School Survival Guide for Preschool Parents - July 29, 2025
- Thanksgiving Ten Frame Counting Mats - November 17, 2024

I’m always looking for some Christmas art ideas to do. This one is so simple yet so cool! It looks awesome on pictures!